Background and Header created by TLP Designz © TLP Designz - DO NOT REMOVE OR COPY. Powered by Blogger.
Friday, December 2, 2011
 Scrap kit by Gina of Gina’s Gems Scraps, her blog is HERE and you can purchase this beautiful kit HERE
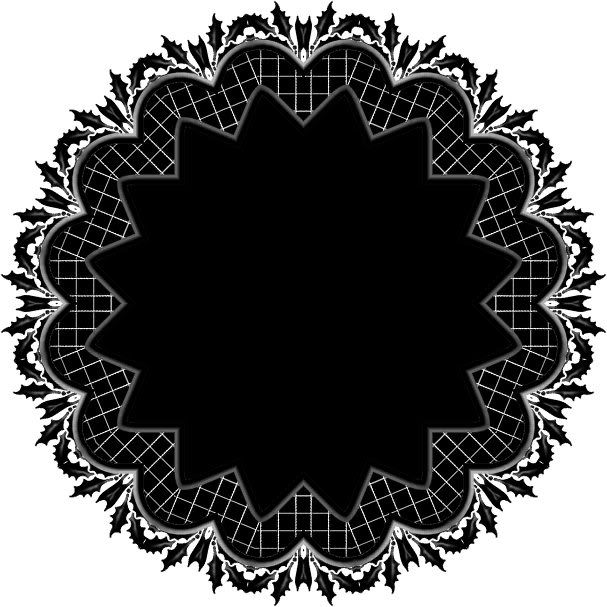
Mask is sg_Christmas5 I don’t remember where I got this mask so if it is yours please let me know so I can credit. Right click and save mask.
 The tube I am using I bought at CILM, but can now be found at CDO
HERE
Font used is St. Nicholas found
HERE
I am using PSP9.
Let’s get started.
I like to work on a big canvas and resize everything down at the end. So open a new canvas 850 X 750. We will resize at the end. All resizing and drop shadows are just suggestions. You may resize all to your liking.
GGS_ CandyCaneDreams_Paper7 Copy and paste into new canvas, making sure it covers the whole canvas by resizing 125% all layers NOT checked.
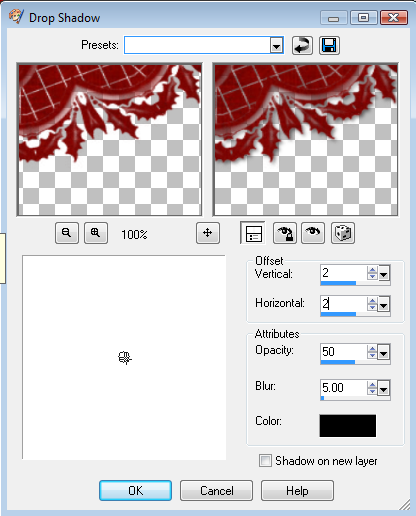
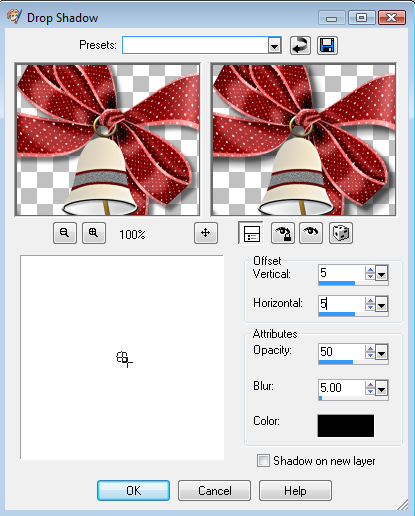
Open your mask in psp. Image, new mask layer, from image. Apply mask, merge group. Resize mask 85%. Apply drop shadow shown below.
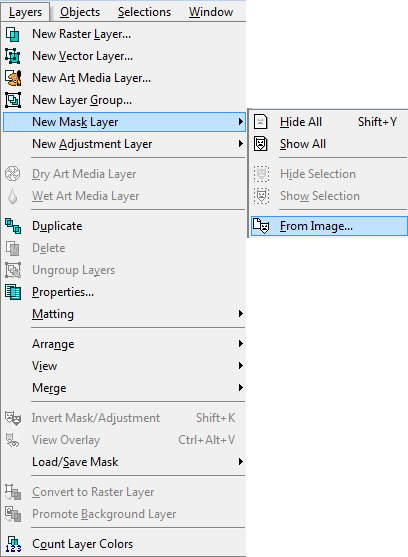
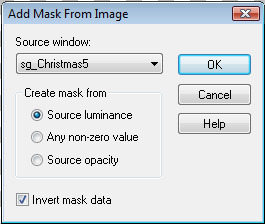

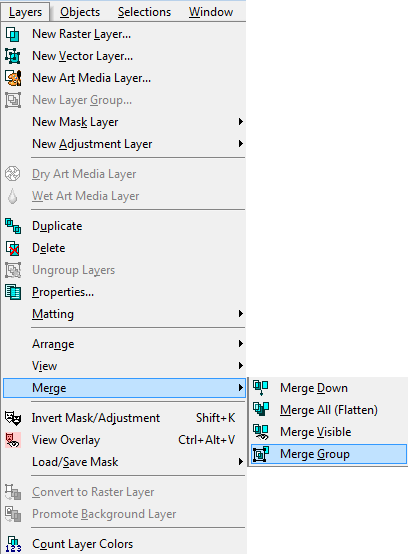
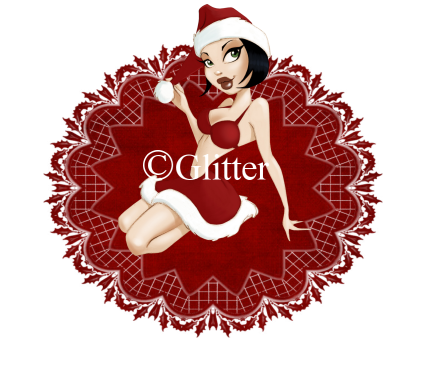
 Apply tube in center of mask. Position as desired.
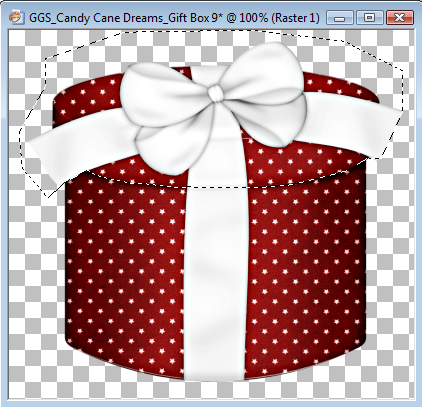
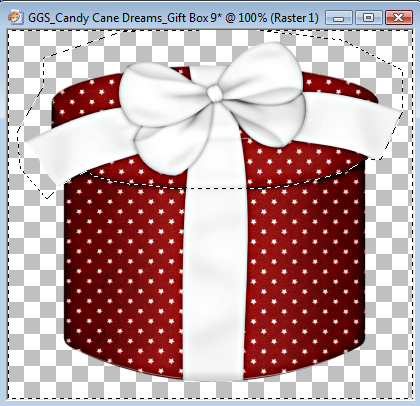
 GGS_ CandyCaneDreams_GiftBox9 Click on your selection tool, with settings below, very carefully click around the lid on box, (see below), invert, copy bottom of box. DO NOT select none yet. Paste box in front of tube, making it appear as if she is inside the box. Undo invert, copy top of box. Rotate top of box to the left 25%. Lean against box.
 GGS_ CandyCaneDreams_PoinsettiaArrangement1 Rotate to the left 95 degrees. Place at bottom left.
GGS_CandyCaneDreams_SnowyRowanBerries C&P Rotate left 125 degrees. Resize 50% then 78%. Remove the stem. Place under poinsettia. Duplicate twice. Mirror one. Resize 95%. Rotate to the right to your liking. Second duplicate flip, rotate to your liking, place in center.
The Holly Branch is in the Add on part of the kit. Resize 50% All layers checked. C&P Flip, resize 70% all layers NOT checked. Duplicate, mirror. Place under berries on both sides.
GGS_CandyCaneDreams_SnowySpruceBranch Resize 50% ALL layers checked. C&P Resize 80% all layers NOT checked. Duplicate, mirror, place below box lid.
GGS_CandyCaneDreams_BowwithBell7 C&P Resize 50% all layers NOT checked. Place in top left.
GGS_CandyCaneDreams_Butterfly1 Resize 50% ALL layers checked. C&P Resize 75% all layers NOT checked. Rotate R 10 degrees. Place in upper left.
GGS_CandyCaneDreams_Butterfly5 Resize 50% ALL layers checked. C&P Mirror, resize 50% NOT checked. Place in upper right.
GGS_CandyCaneDreams_CharmingWrap2 C&P Rotate R 40 degrees. Resize 60% all layers NOT checked. Remove parts of ribbon that hang over the edge of the mask layer.
Choose 3 Christmas Balls. Resize and arrange to your liking. Duplicate, resize duplicate. Move the duplicate one to the right side and place under berries. The original move to the left and place as to layer.
Put a drop shadow on all layers.
 Merge visible. Copy and paste as new image. Resize down to proper tag size. Add your copyright info and water mark. We are done.
 I hope that you enjoyed my tut. If you use my tut I would love to see your results, so send them to me at glitterdeb75@yahoo.com
Subscribe to:
Post Comments
(Atom)
A note
I remember what it was like when just starting out in Paint Shop Pro. There are lots of wonderful tuts out there, but most of them are for experienced taggers. It is hard to find a tut if you are a beginner, so I will try to write all my tuts so the beginner can learn and follow along. There will be lots of screen shots to make it easier on you. I apologize to the experienced taggers, but I think that it is good to help out the beginners all we can. Thanks for understanding.


0 comments:
Post a Comment