Background and Header created by TLP Designz © TLP Designz - DO NOT REMOVE OR COPY. Powered by Blogger.
Blog Archive
Tuesday, January 17, 2012
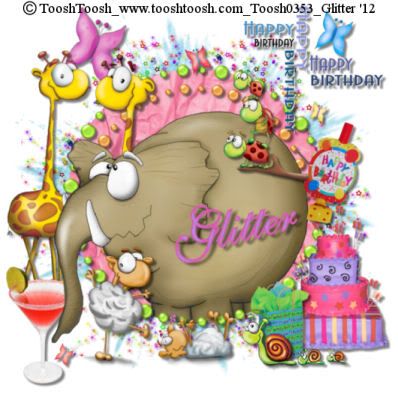 Supplies:
Scrap Kit: Birthday Bash by Angels Designz which you can find HERE or HERE
Mask: WSL_Mask38 HERE
Tube: I am using a freebie by TooshToosh which you can find HERE Even though this tube is free you will still need to use a license number on it.
Font: ShelleyVolante BT HERE
Let’s get started. Again I will have lots of screen shots for the beginner.
I like to work on a big canvas then size down at the end.
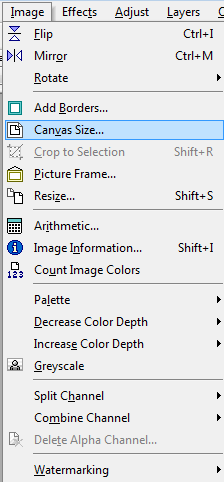
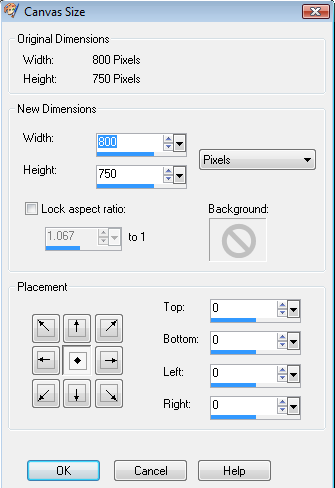
AD_Frame4: Duplicate this by holding down shift + D. Close out original, this way you won’t end up saving the frame and losing it from the kit. Go to Image, canvas size and make it 800 X 750. Resize frame 80% all layers NOT checked.
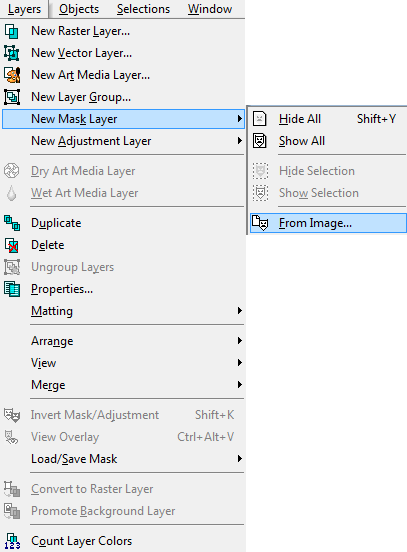
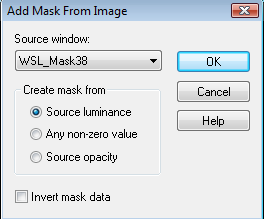
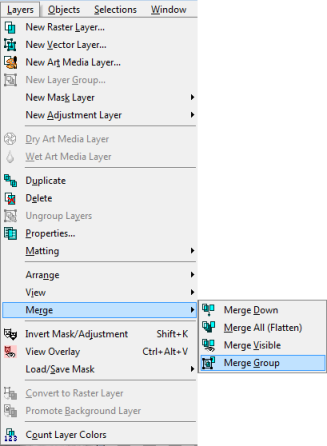
 AD_Paper8: Copy and paste this into your canvas, and place on the bottom. Apply mask, by Layers, New Mask Layer, From Image. Merge group.
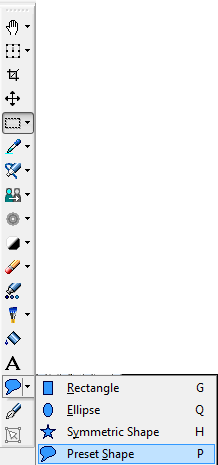
 Go to the preset shapes and choose the elliptical. Make a circle with any color, it doesn’t matter we will delete this soon. Make it so the circle goes through the green circles on the frame layer, see sample. When you have the circle where you want it convert to raster layer. Select, select all, select, float, select, defloat on the circle. Copy and paste AD_Paper9, select, invert, delete key on keyboard, select none. Place your pink circle under the frame. You can delete your drawn circle now.
 Copy and paste the elephant and place where you want.
Copy and paste all the little critters from the tube and place them where you like them.
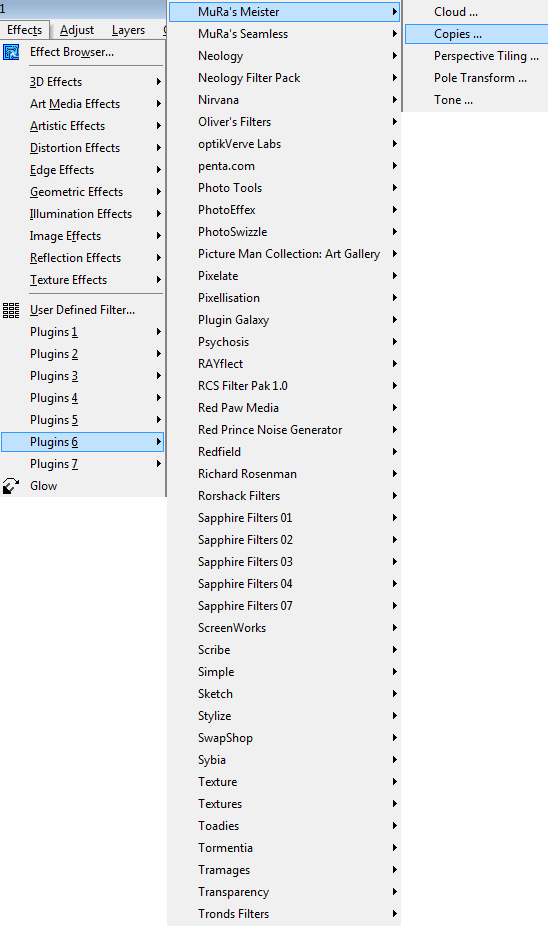
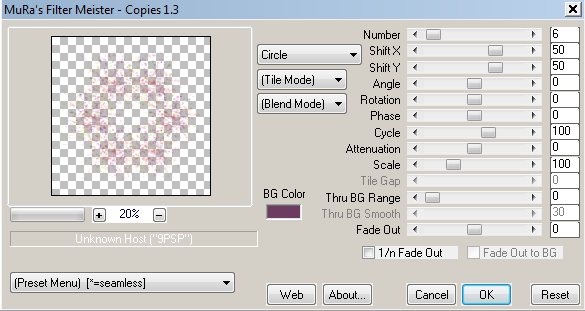
AD_ColorfulSplatter copy and paste this onto your canvas, resize by 50%. Here I used MuraMeister’s Copies. See example. Place below pink paper. Duplicate this layer 3 times, so you have a total of 4 layers of the confetti. This will brighten them up a bit.
 Copy and paste the following elements, resizing and placing as you like. I will show my resize percents.
AD_Cake 35%
AD_Drink2 25%
AD_PartyFavor 35% I rotated this 17 to the right.
AD_Wordart1 50%
Add a drop shadow where desired. I save my projects here in case I want to change something later. Merge visible, copy and paste into a new image. Resize down to proper size. Add your copyright info and your watermark.
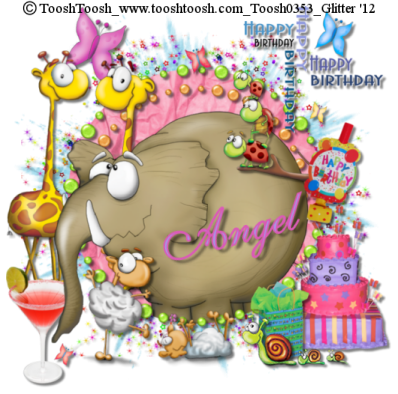 We are done. I hope that you enjoyed this tut. If you work it up I would love to see what you did and put it up here on my blog.
Sunday, January 8, 2012
Hello everyone. I trust everyone had a Merry Christmas and a Happy New Year.
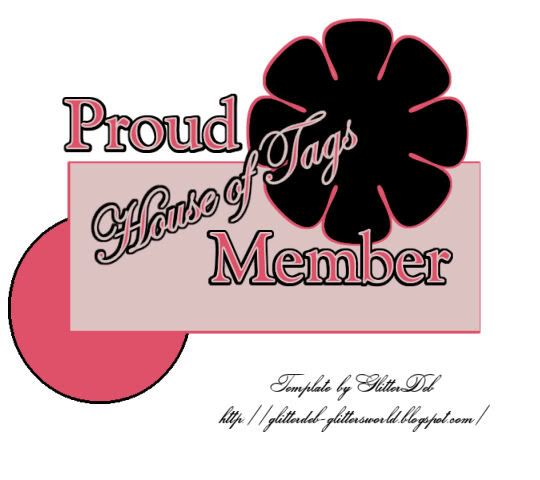
I made a template for an awesome group that i am in and I whipped up a tag to go with it. I used an awesome scrap kit from Gina at KiKeKa Kits called "I do". Check it out here.

 PSP format HERE
PSD format HERE
If you use my template I would love to see your results and will post them on my blog. Thanks so much.

 PSP format HERE
PSD format HERE
If you use my template I would love to see your results and will post them on my blog. Thanks so much.
Subscribe to:
Posts
(Atom)
A note
I remember what it was like when just starting out in Paint Shop Pro. There are lots of wonderful tuts out there, but most of them are for experienced taggers. It is hard to find a tut if you are a beginner, so I will try to write all my tuts so the beginner can learn and follow along. There will be lots of screen shots to make it easier on you. I apologize to the experienced taggers, but I think that it is good to help out the beginners all we can. Thanks for understanding.
