Background and Header created by TLP Designz © TLP Designz - DO NOT REMOVE OR COPY. Powered by Blogger.
Blog Archive
Thursday, November 18, 2010
 Sexy in Aqua
This tut was written on July 18, 2009 by GlitterDeb (that's me)
This is entirely my idea, any resemblance is totally coincidental
This was written using Corel Paint Shop Pro Photo X2 but can be done in others.
Supplies Needed:
Scrap kit is by Kittie’s Sinful Designz called Odelina - Faery Series Part 1 and can be found
HERE
Template is MC_template67 by Melissaz Creationz and can be found
HERE
Mask is WSL_mask226 by Chelle at WeeScotsLass Creations and can be found
HERE
I am using the wonderful art work of Jamie Kidd and it can be found at CILM. Please don’t use this tube unless you have the license to use it and have acquired the tube legally.
HERE
Font I used is Engaged.
HERE
Ok, let’s begin.
Open mask in PSP.
Open up the template. Duplicate and close out the original. Delete copyright layer. I like to work on a big canvas so go to Image, Canvas Size, and make it 700x700.
Close out all the layers.
Click on Raster 7. Use you magic wand and touch inside the black square, flood fill with black, select none.
Click on Raster 2. Selections, select all, float, defloat, copy and paste paper 7 from the kit, selections, invert, hit delete key on keyboard, select none.
Click on the merged layer. Selections, select all, float, defloat, copy and paste paper 16, selections, invert, hit delete key on keyboard, select none.
Click on merged layer again. Selections, select all, float, defloat, modify, expand by 3, fill with black, select none.
Next, click on Raster 5. Selections, select all, float, defloat, copy and paste paper20, resize by 50%, selections, invert, hit delete key on keyboard, select none.
Repeat this on all Copy of Raster 5 layers.
Open your tube image. This tube has a full length layer and also a headshot layer. Copy the headshot layer.
Click on Raster 5 layer again, selections, select all, float, defloat, paste headshot layer, position in box where you want the tube, selections, invert, delete, select none.
Repeat on Copy of Raster 5 layers, except for the bottom box I used the full length tube to get a smaller face.
Click on Raster 4 and use the magic wand on it. Fill with black.
Repeat on all Copy of Raster 4.
Copy and paste full length tube and position to the left side of tag.
In the scrap kit open up button 2. Copy and paste into tag, position where desired. Resize to your liking. Duplicate 2 times and arrange to your liking.
Open flower 1 in scrap kit. Copy and paste into tag, arrange on top of buttons.
Open up clipped flower in scrap kit. Copy and paste into tag. Resize to your liking and position at the top of the tag.
Copy and paste paper 16 and position on the bottom. Open mask, go to layers, new mask layer, from image, click ok. Merge group.
Put drop shadows on all layers that you want.
Add your copyright and license number.
Add your name and/or saying onto tag. I used the font Engaged and with black in the foreground and paper 16 in the background.
And we are done.
I hope that you liked this you enjoyed this tut as much as I did.
Thanks.

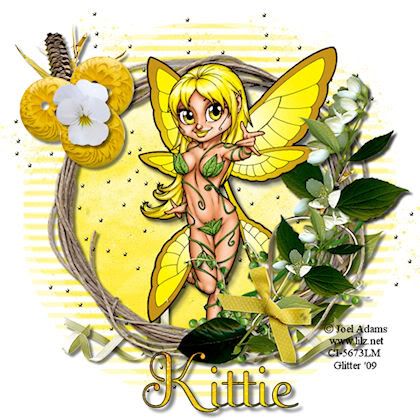
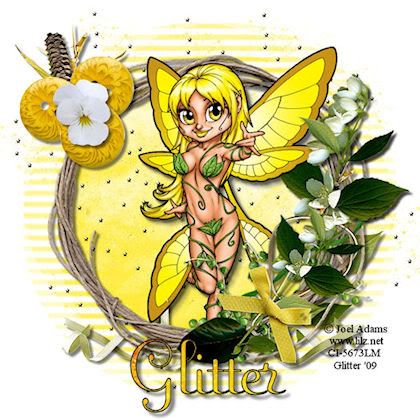 This tut was written by GlitterDeb (that's me) on July 18, 2009. It is entirely my idea. Any similarities are totally coincidental.
Supplies Need:
I wrote this tut in Corel Paint Shop Pro Photo X2, but any PSP program will work.
Scrap Kit: Called Odelina - Faery Series Part 1 by Kittie’s Designz and can be found
HERE
Mask: Mask is WSL_181 and can be found
HERE
Tube: I am using the fabulous artwork of Joel Adams and can be purchased at CILM. Please do not use this tube unless you have the proper license and have obtained the tube legally.
HERE
Font: I used Fling LET and can be found
HERE
Let’s Begin
I like to work on a big surface and then resize later, so open up a new canvas 700x700 and flood fill with white.
Open up Frame 2, copy and paste onto your canvas. Resize 110%.
Take your magic wand and holding down the shift button click inside the frame, including in all the little open spaces around the flowers. This will allow you to get the whole frame covered.
Copy and Paste paper 1, selections, invert, delete key, select none. Put the paper layer below the frame.
Open up tube and resize 110%. Click on the frame layer again and use the magic wand as before where you think you are going to place the tube. Copy and paste tube and place it where desired. Duplicate tube. Close out the duplicate and click back on the original. Do not move either tube layer. Selections, invert, delete, select none. Place this tube layer under the frame layer. Add drop shadow. Open up the duplicate tube layer. Add drop shadow on this tube, then erase the parts that you don’t want on top of the frame.
Now we are going to add the elements. Open up Button 1 (yellow button) and resize to 75%, duplicate twice. Move buttons to desired positions, add drop shadow. Open Flower 1, resize to 25% and place above the buttons. Open up Ginger 1, resize to 75% and place under the buttons where desired. Erase stem showing below buttons, if desired. Open up Heliconia, place below buttons, rotate as desired, and erase stem below buttons if desired. Drop shadow all.
Open Flower Stem. Mirror and place on the right side with the other flowers from the frame, place as desired. Move below frame, duplicate, move duplicate layer above frame. Erase excess on top layer to your liking. Add drop shadows.
Open Ribbon 3, duplicate and mirror duplicate layer. Place both layers at bottom of frame and below frame. Add drop shadows.
Open up Pixie Dust Trail. Place below frame but above paper layer, so the stars show behind your tube layer. Duplicate and position to your liking. I didn’t drop shadow my pixie dust but you may if desired.
Add copyright info and license.
Add your name or saying.
We are finished. I hope that you liked this tut. Thanks.
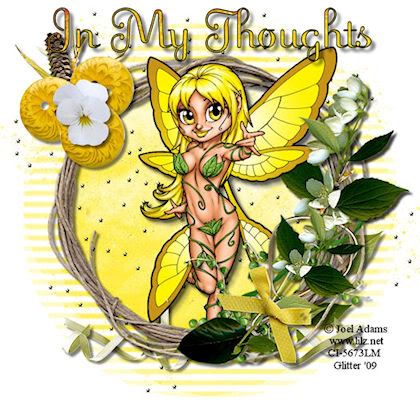
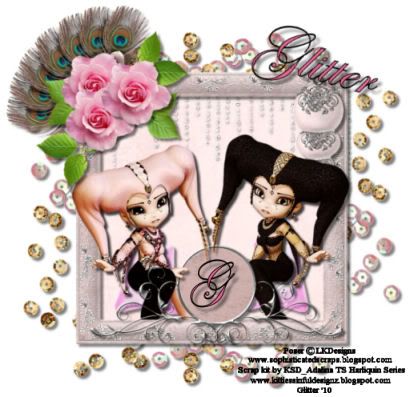 This tag was written on July 30, 2009 and is entirely my idea. Any similarities are purely coincidental. I am writing this using Paint Shop Pro X, but can be done in any version.
Scrap Kit: KSD_Adalina TS Harlequin Series by
Kittie’s Sinful Design
HERE
Font: Edwardian Script ITC
Open frame 1, duplicate, close out original. I like to work on a big space so I use canvas size 700 x 700. Add drop shadow to frame.
Return to frame layer. Click the magic wand inside frame, selections, modify, expand by 8. Copy and paste paper 3, selections, invert, delete key, select none. Place paper layer under frame.
Open pillow. Resize to desired size. Go to deform tool, hold control key and move top of pillow to appear like it is laying down. Duplicate pillow. Place in the left lower corner and one in the right lower corner. Drop shadow both.
Open Adalina Pink Harlequin. Resize to liking, position under frame on top of left pillow. Duplicate Harlequin and close out. Back to original Harlequin layer. Drop shadow. Erase pieces that are sticking out beneath the frame. Open Duplicate and place above frame. Erase pieces where desired.
Open Golden Brown Harlequin. Resize to liking, mirror, place under frame on top of pillow on right side. Duplicate Harlequin and close out. Back to original Harlequin layer. Drop shadow. Erase pieces that are sticking out beneath the frame. Open Duplicate and place above frame. Erase pieces where desired.
Open Flower 1, resize to liking, duplicate 2 times (3 flowers total), arrange to your liking on the left upper corner of frame. Drop shadow all 3.
Open Branch and resize to liking. Rotate to the right 90 degrees, place under flowers. Duplicate, rotate 90 degrees and place at the bottom of the flowers. Add drop shadow to both.
Open Peacock Fan. Resize to liking. Arrange under the frame on the left side. Add drop shadow.
Open Ornament 2, resize to liking, arrange on top of the frame on the right side. Add drop shadow.
Open Sequins 2, arrange at the top under the frame. Duplicate 5 times (6 sequin layers total). Arrange 2 on both sides and one at the bottom of frame. Add drop shadow to all 6.
Open Sequins 2, arrange at the top under the frame. Duplicate 3 times (4 sequin layers total). Arrange one on each side and one at the bottom. Add drop shadow to all 4.
Open Diamond Rain, resize to liking. Arrange right under the frame, but on top of the paper layer. I duplicated the rain, then added a drop shadow using 1, 1, 50, 5.
Open Silver Frame, and resize to liking. Arrange at the bottom of frame. Click magic wand in middle of frame, selections, modify, expand by 2. Copy and paste paper 17, selections, invert, delete key, select none. Merge these two layers.
Add Copyright and watermark.
Add names or saying.
I hope that you enjoyed this tut as much as I have. Thanks for looking.
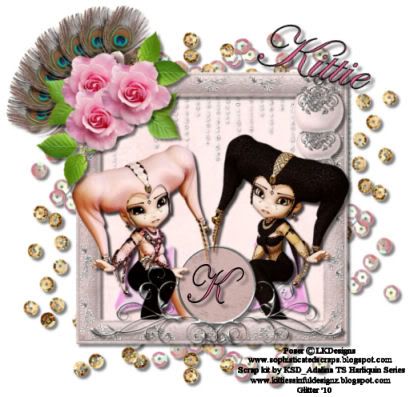
I am once again trying my hand at tut writing. Lots has happened in my life since the last time I have done this. I have been seriously ill and took a break from writing, from tagging also, just didn't have the energy to do much. On May 3,2010 I had a double mastectomy, and was pretty out of it for awhile. But it was worth it because now I can stick around and enjoy my grandkids more. My grandson was born on May 24, 2010 and he is the best reason to stick around. I had another blog but I moved some pictures around and lost them, so I am starting this one to replace the other one. Hope you all enjoy my tuts.
Subscribe to:
Posts
(Atom)
A note
I remember what it was like when just starting out in Paint Shop Pro. There are lots of wonderful tuts out there, but most of them are for experienced taggers. It is hard to find a tut if you are a beginner, so I will try to write all my tuts so the beginner can learn and follow along. There will be lots of screen shots to make it easier on you. I apologize to the experienced taggers, but I think that it is good to help out the beginners all we can. Thanks for understanding.
