Background and Header created by TLP Designz © TLP Designz - DO NOT REMOVE OR COPY. Powered by Blogger.
Blog Archive
Thursday, November 3, 2011
 Supplies
Scrap Kit: By Freek of Freek’s Designs
HERE
Mask: 315InsatiableDreams
HERE
Tube: I used the awesome artwork of Keith Garvey, which can be purchased at PTE. Do NOT use without the proper license number and you must have purchased it legally. HERE
Font: Thanksgiving
HERE
Gradient: I don’t remember where I got this so I have zipped it up for you. If this is your gradient and you want me to link to you please let me know.
HERE
Let’s Get started
Pieces used in tag from scrap kit:
FC_GiveThanksPU_TS_e40
FC_GiveThanksPU_TS_p4
FC_GiveThanksPU_TS_p6
FC_GiveThanksPU_TS_e41
FC_GiveThanksPU_TS_e11
FC_GiveThanksPU_TS_e9
FC_GiveThanksPU_TS_e31
FC_GiveThanksPU_TS_e15
FC_GiveThanksPU_TS_e16
FC_GiveThanksPU_TS_e20
Open a new canvas 750 X 750 (will resize later).
Open mask in psp. Copy & paste paper 6 into canvas. Layers, new mask layer, from image. Apply mask, merge group.
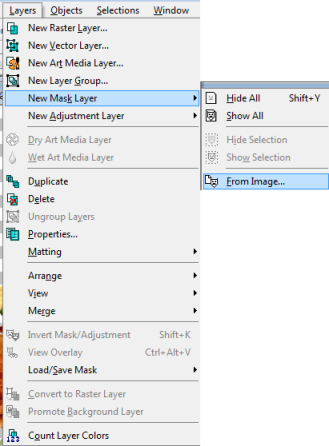
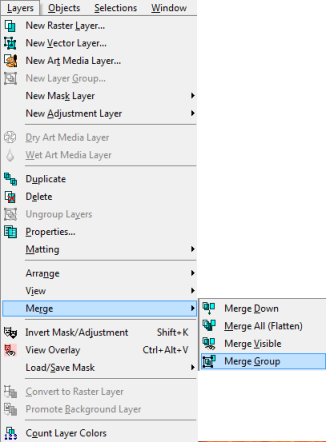 I put a little drop shadow on the mask of 2, 2, 50, 5.
Open frame40 in psp. Copy & paste into your canvas. Take your magic wand and while holding down the shift key click until all the parts have ants where you want them. (see below)
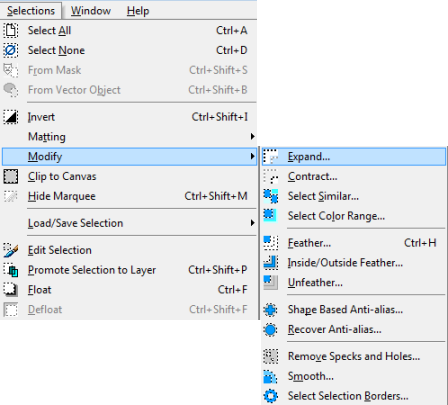
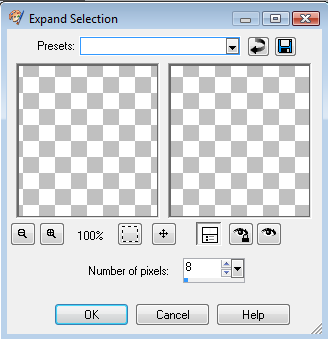
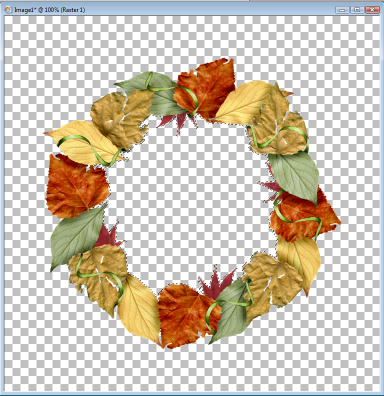 Selections, modify, expand by 8.
 Copy & paste paper 4, place below frame layer. Selections, invert, delete key, select none. On paper layer selections, float, defloat, paste tube and resize and position where you want it. Duplicate tube, move to the top of frame and close out the eye (see below).
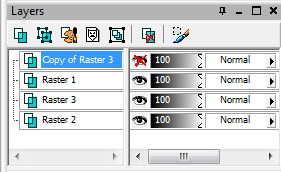
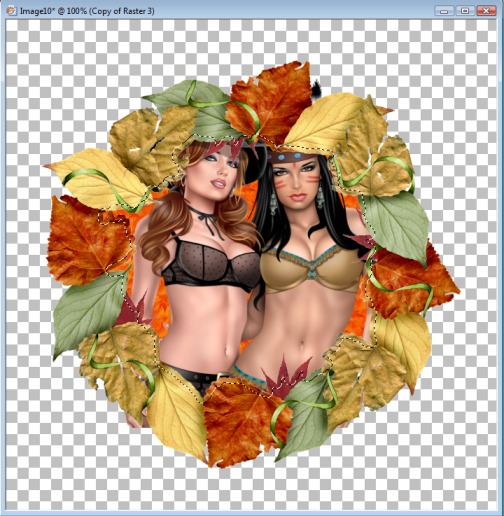 Go back to original tube layer, selections, invert, delete key. Now go to duplicated tube layer, add drop shadow of 5, 5, 50, 5, or something to your liking. With your eraser too remove the parts that you want removed, being careful around where the drop shadow, don’t take off too much in those areas. Add drop shadow to frame. Click on the eye for the mask layer. Here I merged visible and moved it to the top of the canvas. Be sure to move the mask layer also.
Copy & paste element 41, resize 50% and move to the top right corner. Duplicate, mirror, merge down, add drop shadow, move down right above mask layer.
Copy & paste element 11. Move to the left side of the frame.
Copy & paste element 9, rotate left 45, resize 70%, move to the left side and position to your liking.
Copy & paste element 31. Resize 85%, position in middle of the tag at the bottom.
Copy & paste element 15. Resize 50% and move to the lower left.
Copy & paste element 16. Resize 50% and move to the lower right.
Copy and paste element 20. Resize 50% twice and place at bottom on top of word art.
Add copyright info and your mark. We are now ready to place the names on it.
 I hope that you enjoyed my tut. I would love to see what you do with this kit, send your samples to me at glitterdeb75@yahoo.com
Subscribe to:
Post Comments
(Atom)
A note
I remember what it was like when just starting out in Paint Shop Pro. There are lots of wonderful tuts out there, but most of them are for experienced taggers. It is hard to find a tut if you are a beginner, so I will try to write all my tuts so the beginner can learn and follow along. There will be lots of screen shots to make it easier on you. I apologize to the experienced taggers, but I think that it is good to help out the beginners all we can. Thanks for understanding.


0 comments:
Post a Comment