Background and Header created by TLP Designz © TLP Designz - DO NOT REMOVE OR COPY. Powered by Blogger.
Blog Archive
Tuesday, July 19, 2011
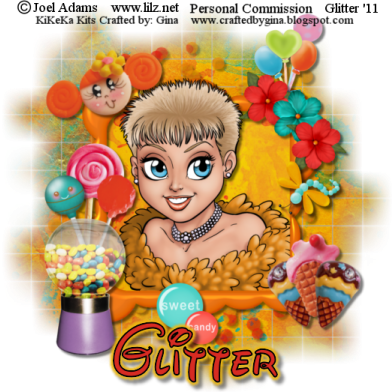
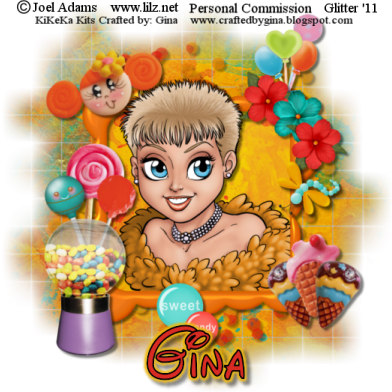
 This is entirely my creation. Any resemblances are purely coincidental. I have tried to write this in simple steps so even the beginner can understand it. Supplies Scrap kit: Lollipop by KiKeKa Kits HERE Tube: I am using one from Joel Adams, a personal commission. Any tube will work. Font: Walt Disney Script Mask: WSL_84 by Weescotlass HERE Let’s begin Open a new canvas 600 x 600 Cbg_lollipop_paper13 Resize 22% resize all layers checked Copy and paste as new layer Open mask 84 Layers, new mask layer, from image Merge group. Apply a drop shadow of 1, 1, 50, 5. Open cbg_lollipop_spots02 Resize 33% all layers checked Resize 50% all layers checked Copy and paste on to top of mask layer. Position to the right top Duplicate layer, mirror. Merge down. Duplicate this layer. Flip and mirror. Merge down. Apply drop shadow of 5, 5, 50, 5 Open cbg_lollipop_frame01 Resize 38% all layers checked Resize 50% all layers checked Copy and paste on top of spots. Use magic wand inside frame. Selections, modify, expand by 8. Open cgb_lollipop_paper14. Resize 22% all layers checked. Resize 50% all layers checked. Copy and paste as new layer. Position below frame and arrange to your liking. Selections, invert, hit delete key on keyboard. DO NOT DESELECT. Here you place the tube of your choice and place under frame. Duplicate tube and place on top of frame. Close the eye on the layers palette on the right of psp. Go back to original tube layer and hit delete key on keyboard. Go to copy of tube and add a drop shadow of your choice. I used 5, 5, 50, 5 on all items from here on out. Use eraser to erase all the unwanted parts of the tube. The following elements can be placed around frame as you like. This is only a guide, I will tell you how I resized them all. Apply drop shadow to all. Cbg_lollipop_girl02 Copy and paste as new layer. Resize by 50%, then by 75% All layers NOT checked. Rotate 20 degrees to the left. Cbg_lollipop_lollipop04 Resize 72% all layers checked. Copy and paste as new layer. Resize 50% all layers NOT checked Repeat resize 50%, then resize 75% All layers NOT checked. Cbg_lollipop_02 Resize 64% all layers checked. Copy and paste as new layer. Resize 50% all layers NOT checked. Repeat resize 50%, then resize 75%. Rotate left 15 degrees. Cbg_lollipop_lollipop06 Resize 66% all layers checked. Copy and paste as new layer. Resize 50% all layers NOT checked. Repeat resize 50% then resize 75%. Rotate to the right 15 degrees. Cbg_lollipop_icecream02 Copy and paste as new layer. Resize 50%, repeat resize 50%, Then resize 80%. Duplicate, mirror. Cbg_lollipop_icecream Copy and paste as new layer. Resize 50%, repeat resize 50%. Cbg_lollipop_flower02 Resize 91%, all layers checked. Resize 50%, repeat resize 50%. Copy and paste as new layer. Resize 50% all layers NOT checked. Resize 75%. Duplicate, flip. Cbg_lollipop_flower04 Resize 96% all layers checked. Resize 50%, repeat resize 50%. Copy and paste as new layer. Resize 50% all layers NOT checked. Resize 75%. Cbg_lollipop_dragonfly02 Resize 76% all layers checked. Resize 50%, repeat resize 50%. Copy and paste as new layer. Resize 50% all layers NOT checked. Resize 75%. Cbg_lollipop_candy04 Resize 44% all layers checked. Resize 50%, repeat resize 50%. Copy and paste as new layer. Resize 50% all layers NOT checked. Resize 95%. Cbg_lollipop_brad02 Resize 50% all layers checked. Repeat resize 50%. Copy and paste as new layer. Resize 50% all layers NOT checked. Resize 50% Cbg_lollipop_brad04 Resize 50% all layers checked. Repeat resize 50%. Copy and paste as new layer. Resize 50% all layers NOT checked. Resize 75%. Cbg_lollipop_balloons Resize 40% all layers checked. Resize 50%, repeat resize 50%. Copy and paste as new layer. Resize 75% all layers NOT checked. Merge visible. Add your copyright. Save in png or jpeg format, whichever you prefer. Add your name. I added a glow to my name 7 medium. That’s it. Simple.
  I hope that you enjoy my tut as much as I did writing it.
Subscribe to:
Post Comments
(Atom)
A note
I remember what it was like when just starting out in Paint Shop Pro. There are lots of wonderful tuts out there, but most of them are for experienced taggers. It is hard to find a tut if you are a beginner, so I will try to write all my tuts so the beginner can learn and follow along. There will be lots of screen shots to make it easier on you. I apologize to the experienced taggers, but I think that it is good to help out the beginners all we can. Thanks for understanding.


0 comments:
Post a Comment