Blinkies


Sunday, July 24, 2011
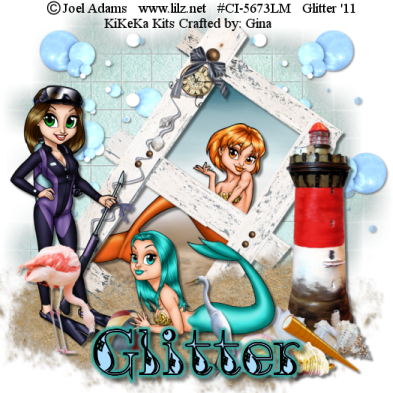
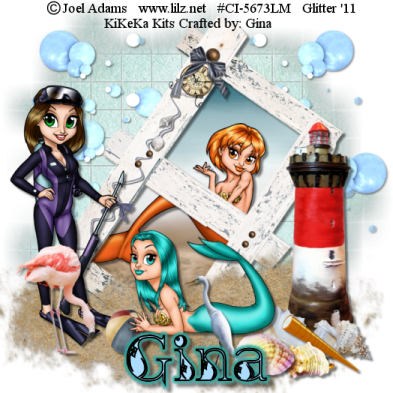
By The Sea
This tut is entirely my creation. Any resemblances are purely coincidental.
 Supplies
Scrap Kit: By The Sea by KiKeKa Kits
HERE
Mask: WSL_84
HERE
3 Tubes by the same artist: I used tubes by Joel Adams which I purchased through CILM. You can get the tubes at CDO. Please don’t use these tubes without purchasing them. You must also get a license number from CDO.
HERE
Font: Kingthings Inkydink
HERE
Open a new canvas and go to Images, canvas resize 760 x 760. We will resize at the end.
Open cbg_bythesea_paper07. Resize by 99% to get to 100%. Copy & paste into your canvas. Open mask. Go to layers, new mask layer, from image. Merge group. I added a drop shadow of 1, 1, 50, 5.
Open cbg_bythesea_bubbles01. Copy & paste onto your canvas. Resize 50% then 80% all layers NOT checked. Place in upper right. Duplicate, mirror. Duplicate original again and rotate 45%. Merge all 3 bubble layers, add a drop shadow of 2, 2, 50, 5.
Open cbg_bythesea_frame02. Copy and paste onto your canvas. Rotate right 35%.
Open Use your magic and click inside both frame holes. Selections, modify, expand by 12. Keep repeating expand until you get the ants to cover all the inside of your frame. This will make it have the ants outside the frame itself in a few places. Open paper cbg_bythesea_paper02. Resize 99%, then 75% all layers checked. Copy & paste onto canvas and place under frame. Resize until you get the picture you want. Selections, invert, hit delete key on keyboard. Selections, select none.
Open cbg_bythesea_lighthouse. Copy and paste onto your canvas. Resize 80% and place to the right of frame.
Open the following elements and copy and paste them onto your canvas, one at a time. Resize each one to your liking and place where you want them.
Cbg_bythesea_scpoe
Cbg_bythesea_shell01
Cbg_bythesea_shell02
Cbg_bythesea_shell03
Cbg_bythesea_shell04
Cbg_bythesea_ball01
Cbg_bythesea_bird01
Cbg_bythesea_bird02 Mirror both birds
Give each of your elements and frame a drop shadow of 2, 2, 50, 5.
Open up cbg_bythesea_sand. Copy and paste sand onto your canvas 4 times. Rearrange sand to your liking. Merge all sand together and add drop shadow of 1, 1, 50, 5.
Open up tubes. Copy and place where you want them. Resize as needed. Place a drop shadow of 2, 2, 50, 5.
Mask and sand have a drop shadow of 1, 1, 50, 5. Everything else has a drop shadow of 2, 2, 50, 5.
Here I save it in psp form to move things if need be. Merge visible, resize 97% all layers NOT checked. Resize again down so your canvas is not larger than 525 x 525.
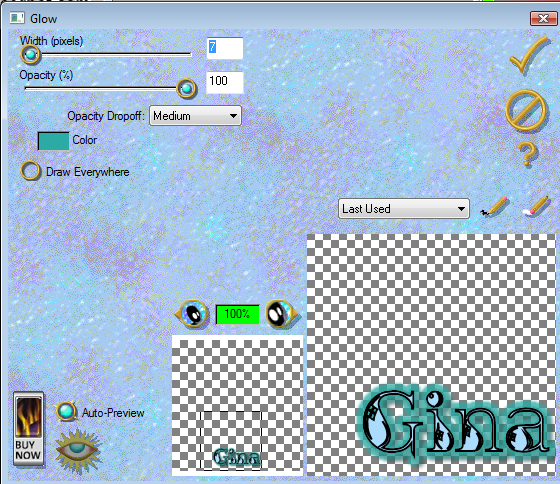
Add your copyright info, add name (I put a glow on my name, see below), and we are done.
Supplies
Scrap Kit: By The Sea by KiKeKa Kits
HERE
Mask: WSL_84
HERE
3 Tubes by the same artist: I used tubes by Joel Adams which I purchased through CILM. You can get the tubes at CDO. Please don’t use these tubes without purchasing them. You must also get a license number from CDO.
HERE
Font: Kingthings Inkydink
HERE
Open a new canvas and go to Images, canvas resize 760 x 760. We will resize at the end.
Open cbg_bythesea_paper07. Resize by 99% to get to 100%. Copy & paste into your canvas. Open mask. Go to layers, new mask layer, from image. Merge group. I added a drop shadow of 1, 1, 50, 5.
Open cbg_bythesea_bubbles01. Copy & paste onto your canvas. Resize 50% then 80% all layers NOT checked. Place in upper right. Duplicate, mirror. Duplicate original again and rotate 45%. Merge all 3 bubble layers, add a drop shadow of 2, 2, 50, 5.
Open cbg_bythesea_frame02. Copy and paste onto your canvas. Rotate right 35%.
Open Use your magic and click inside both frame holes. Selections, modify, expand by 12. Keep repeating expand until you get the ants to cover all the inside of your frame. This will make it have the ants outside the frame itself in a few places. Open paper cbg_bythesea_paper02. Resize 99%, then 75% all layers checked. Copy & paste onto canvas and place under frame. Resize until you get the picture you want. Selections, invert, hit delete key on keyboard. Selections, select none.
Open cbg_bythesea_lighthouse. Copy and paste onto your canvas. Resize 80% and place to the right of frame.
Open the following elements and copy and paste them onto your canvas, one at a time. Resize each one to your liking and place where you want them.
Cbg_bythesea_scpoe
Cbg_bythesea_shell01
Cbg_bythesea_shell02
Cbg_bythesea_shell03
Cbg_bythesea_shell04
Cbg_bythesea_ball01
Cbg_bythesea_bird01
Cbg_bythesea_bird02 Mirror both birds
Give each of your elements and frame a drop shadow of 2, 2, 50, 5.
Open up cbg_bythesea_sand. Copy and paste sand onto your canvas 4 times. Rearrange sand to your liking. Merge all sand together and add drop shadow of 1, 1, 50, 5.
Open up tubes. Copy and place where you want them. Resize as needed. Place a drop shadow of 2, 2, 50, 5.
Mask and sand have a drop shadow of 1, 1, 50, 5. Everything else has a drop shadow of 2, 2, 50, 5.
Here I save it in psp form to move things if need be. Merge visible, resize 97% all layers NOT checked. Resize again down so your canvas is not larger than 525 x 525.
Add your copyright info, add name (I put a glow on my name, see below), and we are done.
 I hope you enjoyed my tut.
If you do any of my tuts please send to me at my email addy of glitterdeb75@yahoo.com and I will put them on my blog.
I hope you enjoyed my tut.
If you do any of my tuts please send to me at my email addy of glitterdeb75@yahoo.com and I will put them on my blog.
 Supplies
Scrap Kit: By The Sea by KiKeKa Kits
HERE
Mask: WSL_84
HERE
3 Tubes by the same artist: I used tubes by Joel Adams which I purchased through CILM. You can get the tubes at CDO. Please don’t use these tubes without purchasing them. You must also get a license number from CDO.
HERE
Font: Kingthings Inkydink
HERE
Open a new canvas and go to Images, canvas resize 760 x 760. We will resize at the end.
Open cbg_bythesea_paper07. Resize by 99% to get to 100%. Copy & paste into your canvas. Open mask. Go to layers, new mask layer, from image. Merge group. I added a drop shadow of 1, 1, 50, 5.
Open cbg_bythesea_bubbles01. Copy & paste onto your canvas. Resize 50% then 80% all layers NOT checked. Place in upper right. Duplicate, mirror. Duplicate original again and rotate 45%. Merge all 3 bubble layers, add a drop shadow of 2, 2, 50, 5.
Open cbg_bythesea_frame02. Copy and paste onto your canvas. Rotate right 35%.
Open Use your magic and click inside both frame holes. Selections, modify, expand by 12. Keep repeating expand until you get the ants to cover all the inside of your frame. This will make it have the ants outside the frame itself in a few places. Open paper cbg_bythesea_paper02. Resize 99%, then 75% all layers checked. Copy & paste onto canvas and place under frame. Resize until you get the picture you want. Selections, invert, hit delete key on keyboard. Selections, select none.
Open cbg_bythesea_lighthouse. Copy and paste onto your canvas. Resize 80% and place to the right of frame.
Open the following elements and copy and paste them onto your canvas, one at a time. Resize each one to your liking and place where you want them.
Cbg_bythesea_scpoe
Cbg_bythesea_shell01
Cbg_bythesea_shell02
Cbg_bythesea_shell03
Cbg_bythesea_shell04
Cbg_bythesea_ball01
Cbg_bythesea_bird01
Cbg_bythesea_bird02 Mirror both birds
Give each of your elements and frame a drop shadow of 2, 2, 50, 5.
Open up cbg_bythesea_sand. Copy and paste sand onto your canvas 4 times. Rearrange sand to your liking. Merge all sand together and add drop shadow of 1, 1, 50, 5.
Open up tubes. Copy and place where you want them. Resize as needed. Place a drop shadow of 2, 2, 50, 5.
Mask and sand have a drop shadow of 1, 1, 50, 5. Everything else has a drop shadow of 2, 2, 50, 5.
Here I save it in psp form to move things if need be. Merge visible, resize 97% all layers NOT checked. Resize again down so your canvas is not larger than 525 x 525.
Add your copyright info, add name (I put a glow on my name, see below), and we are done.
Supplies
Scrap Kit: By The Sea by KiKeKa Kits
HERE
Mask: WSL_84
HERE
3 Tubes by the same artist: I used tubes by Joel Adams which I purchased through CILM. You can get the tubes at CDO. Please don’t use these tubes without purchasing them. You must also get a license number from CDO.
HERE
Font: Kingthings Inkydink
HERE
Open a new canvas and go to Images, canvas resize 760 x 760. We will resize at the end.
Open cbg_bythesea_paper07. Resize by 99% to get to 100%. Copy & paste into your canvas. Open mask. Go to layers, new mask layer, from image. Merge group. I added a drop shadow of 1, 1, 50, 5.
Open cbg_bythesea_bubbles01. Copy & paste onto your canvas. Resize 50% then 80% all layers NOT checked. Place in upper right. Duplicate, mirror. Duplicate original again and rotate 45%. Merge all 3 bubble layers, add a drop shadow of 2, 2, 50, 5.
Open cbg_bythesea_frame02. Copy and paste onto your canvas. Rotate right 35%.
Open Use your magic and click inside both frame holes. Selections, modify, expand by 12. Keep repeating expand until you get the ants to cover all the inside of your frame. This will make it have the ants outside the frame itself in a few places. Open paper cbg_bythesea_paper02. Resize 99%, then 75% all layers checked. Copy & paste onto canvas and place under frame. Resize until you get the picture you want. Selections, invert, hit delete key on keyboard. Selections, select none.
Open cbg_bythesea_lighthouse. Copy and paste onto your canvas. Resize 80% and place to the right of frame.
Open the following elements and copy and paste them onto your canvas, one at a time. Resize each one to your liking and place where you want them.
Cbg_bythesea_scpoe
Cbg_bythesea_shell01
Cbg_bythesea_shell02
Cbg_bythesea_shell03
Cbg_bythesea_shell04
Cbg_bythesea_ball01
Cbg_bythesea_bird01
Cbg_bythesea_bird02 Mirror both birds
Give each of your elements and frame a drop shadow of 2, 2, 50, 5.
Open up cbg_bythesea_sand. Copy and paste sand onto your canvas 4 times. Rearrange sand to your liking. Merge all sand together and add drop shadow of 1, 1, 50, 5.
Open up tubes. Copy and place where you want them. Resize as needed. Place a drop shadow of 2, 2, 50, 5.
Mask and sand have a drop shadow of 1, 1, 50, 5. Everything else has a drop shadow of 2, 2, 50, 5.
Here I save it in psp form to move things if need be. Merge visible, resize 97% all layers NOT checked. Resize again down so your canvas is not larger than 525 x 525.
Add your copyright info, add name (I put a glow on my name, see below), and we are done.

 I hope you enjoyed my tut.
If you do any of my tuts please send to me at my email addy of glitterdeb75@yahoo.com and I will put them on my blog.
I hope you enjoyed my tut.
If you do any of my tuts please send to me at my email addy of glitterdeb75@yahoo.com and I will put them on my blog.
Subscribe to:
Post Comments
(Atom)
0 comments:
Post a Comment