Blinkies


Monday, August 4, 2014
Asian Delights
This tut is entirely of my imagination. Any similarities is purely coincidental. This was written on August 4, 2014.

Supplies Needed:
PSP any program will work but I use PSP9.
Asian Delights scrap kit by Mary Deen of Mary‘s Designs, and can be found
HERE
WSL_Mask 38 and can be found
HERE
Template BabesDesignz_Template16. Unfortunately Babes Designz has closed her blog. I have uploaded the template to 4shared until she decides to start another blog. I didn't realize that she had closed her blog until after I made the tag. I have all of her templates already saved. If you have trouble getting the template please let me know.
HERE
Tube my Sonia Roji 7-2 and can be found
HERE
Please do not use this tube without the proper license to do so. Thanks.
Font: Fontasia and can be found
HERE
Make color canvases with the following colors.
Colors used are taken from the background green and from the flowers in the girls hair. Red-Orange
Green: #466031
Red-Orange: #D71E13
Black: #000000
Drop shadow used (unless otherwise stated):
5, 5, 50, 5, Black.
Open the template in PSP. Shift + D to duplicate template. Close out original.
Image, Canvas Size, 800 x 800. We will resize this later.
Delete Credits.
Work with the layers on template from bottom to top.
Go to bottom, click on background.
Background 6 from the kit.
Copy and paste right above background on template.
Open mask in PSP.
Layers, New Mask Layer, From Image.
Merge Group.
Add slight drop shadow to your liking. I used 0, 0, 50, 5, Black.
Bamboo layer, Selections, select all, float, defloat, copy and paste the green color that you made, Selections, invert, delete. Select none.
Add drop shadow to your liking. Delete original bamboo layer.
Cherry Blossom layer, Selections, select all, float, defloat, copy and paste background 7, Selections, invert, delete. Select none. Add drop shadow to your liking. Delete original Cherry Blossom layer.
Circle leave like it is.
Slats, Selections, select all, float, defloat, copy and paste Red-Orange canvas that you made, Selections, invert, delete. Do NOT select none yet. Copy and paste close-up of tube on top of orange. Place where you like. Hit delete key. Select none. Layer properties make tube layer luminance. Delete original Slats layer.
Circle Frame layer, Selections, select all, float, defloat, modify, contract 11, copy and paste background 6, Selections, invert, delete. Do NOT select none. Copy and paste tube into circles, mirror one tube. Hit delete key. Add drop shadow to your tube layers. Back to Circle Frame layer. Selections, select all, float, defloat, copy and paste black canvas, invert, delete. Delete original Circle Frame layer.
Elements Used:
AsianDelight8(6)
Copy and paste, mirror, Resize 45%, sharpen
AsianDelights(5)
Place this right above the bamboo layer.
AsianDelights11(3)
Copy and paste, mirror, Resize 45%, sharpen.
AsianDelights12(7)
Copy and paste, mirror, Resize 45%, sharpen.
Take 3 of the word elements. On all 3:
Selections, select all, float, defloat, modify, expand by 3, copy and paste background 6, selections, invert, delete. Move the word above the paper, merge down, Resize 45%, place where you like.
Place a drop shadow on all layers, on some you may have to sharpen.
Add copyright info. Save as png or jpeg.
Add a saying or your name.
And we are done. I hope that you liked working this tut as much as I like making it. I would love to see your results. Please send a copy of your work to me at glitterdeb75@yahoo.com Thanks so much.


This tut is entirely of my imagination. Any similarities is purely coincidental. This was written on August 4, 2014.

Supplies Needed:
PSP any program will work but I use PSP9.
Asian Delights scrap kit by Mary Deen of Mary‘s Designs, and can be found
HERE
WSL_Mask 38 and can be found
HERE
Template BabesDesignz_Template16. Unfortunately Babes Designz has closed her blog. I have uploaded the template to 4shared until she decides to start another blog. I didn't realize that she had closed her blog until after I made the tag. I have all of her templates already saved. If you have trouble getting the template please let me know.
HERE
Tube my Sonia Roji 7-2 and can be found
HERE
Please do not use this tube without the proper license to do so. Thanks.
Font: Fontasia and can be found
HERE
Make color canvases with the following colors.
Colors used are taken from the background green and from the flowers in the girls hair. Red-Orange
Green: #466031
Red-Orange: #D71E13
Black: #000000
Drop shadow used (unless otherwise stated):
5, 5, 50, 5, Black.
Open the template in PSP. Shift + D to duplicate template. Close out original.
Image, Canvas Size, 800 x 800. We will resize this later.
Delete Credits.
Work with the layers on template from bottom to top.
Go to bottom, click on background.
Background 6 from the kit.
Copy and paste right above background on template.
Open mask in PSP.
Layers, New Mask Layer, From Image.
Merge Group.
Add slight drop shadow to your liking. I used 0, 0, 50, 5, Black.
Bamboo layer, Selections, select all, float, defloat, copy and paste the green color that you made, Selections, invert, delete. Select none.
Add drop shadow to your liking. Delete original bamboo layer.
Cherry Blossom layer, Selections, select all, float, defloat, copy and paste background 7, Selections, invert, delete. Select none. Add drop shadow to your liking. Delete original Cherry Blossom layer.
Circle leave like it is.
Slats, Selections, select all, float, defloat, copy and paste Red-Orange canvas that you made, Selections, invert, delete. Do NOT select none yet. Copy and paste close-up of tube on top of orange. Place where you like. Hit delete key. Select none. Layer properties make tube layer luminance. Delete original Slats layer.
Circle Frame layer, Selections, select all, float, defloat, modify, contract 11, copy and paste background 6, Selections, invert, delete. Do NOT select none. Copy and paste tube into circles, mirror one tube. Hit delete key. Add drop shadow to your tube layers. Back to Circle Frame layer. Selections, select all, float, defloat, copy and paste black canvas, invert, delete. Delete original Circle Frame layer.
Elements Used:
AsianDelight8(6)
Copy and paste, mirror, Resize 45%, sharpen
AsianDelights(5)
Place this right above the bamboo layer.
AsianDelights11(3)
Copy and paste, mirror, Resize 45%, sharpen.
AsianDelights12(7)
Copy and paste, mirror, Resize 45%, sharpen.
Take 3 of the word elements. On all 3:
Selections, select all, float, defloat, modify, expand by 3, copy and paste background 6, selections, invert, delete. Move the word above the paper, merge down, Resize 45%, place where you like.
Place a drop shadow on all layers, on some you may have to sharpen.
Add copyright info. Save as png or jpeg.
Add a saying or your name.
And we are done. I hope that you liked working this tut as much as I like making it. I would love to see your results. Please send a copy of your work to me at glitterdeb75@yahoo.com Thanks so much.


Saturday, March 1, 2014
Hello all. I will be going through a breast reconstruction very shortly and I want to post my thoughts and experiences as I go through this. I wish that I had done this when I went through the cancer and mastectomy. I will post some before and after pictures, so please be aware of this with little eyes around. The procedure that I will be getting done is a TRAM flap. I will be getting a tummy tuck and the tissue from this will be tunneled under the skin and then used to reconstruct the new breasts. My surgeon will be Dr. Cassidy Mitchell. He is located in Lincoln, Nebraska. Dr. Mitchell says this surgery will last 6-8 hours. The recovery time afterwards will be 4-5 months and no lifting at all during recovery. I live about 3-4 hours away from Lincoln. There will be numerous trips to Lincoln after the surgery. My sister Carla is coming to live with me. She has had her share of problems and didn't have anywhere to go, so I offered her a place to stay. Her coming here to live is a God-send. This will help her out and me out. I didn't know what I was going to do or who I was going to get to help me out. So this move will benefit both of us. I am so looking forward to seeing her again. I can't wait for her to get here. She will be leaving North Carolina on Friday, March 7th. She should get here around Monday through Wednesday, depending on how far she drives each day. My first procedure will be March 13th. The doctor wants to do an out-patient procedure to help make the blood vessels more viable. I am not really sure what will be done but I will tell you more about it after it is done.
I am excited and scared at the same time. This is going to be very painful. When they did the double mastectomy I was cut from back to back, all the way across my chest except for a finger wide piece in the middle. This time I will be cut there again, along with being cut from hip to hip, to do the tummy tuck. I know this will be extremely painful. I am not looking forward to the pain. Right now I have pain due to my fibromyalgia. That will get worse with the surgery. But I am looking forward to the end results, to have boobs again. At times I am self-conscious about not having any. At first it didn't bother me, it was kind of nice not having those 10 pounds on my chest. But I am ready to get them back. Make me feel like a woman again. It will be a difficult 6 months but well worth it in the end.
Will post more later.
I am excited and scared at the same time. This is going to be very painful. When they did the double mastectomy I was cut from back to back, all the way across my chest except for a finger wide piece in the middle. This time I will be cut there again, along with being cut from hip to hip, to do the tummy tuck. I know this will be extremely painful. I am not looking forward to the pain. Right now I have pain due to my fibromyalgia. That will get worse with the surgery. But I am looking forward to the end results, to have boobs again. At times I am self-conscious about not having any. At first it didn't bother me, it was kind of nice not having those 10 pounds on my chest. But I am ready to get them back. Make me feel like a woman again. It will be a difficult 6 months but well worth it in the end.
Will post more later.
Tuesday, October 1, 2013
I would like to apoligize for not posting more tuts. It has been pretty crazy here. My father-in-law passed away very unexpectedly. Was a shock to everyone. He wasn't sick at all. He got up that morning and got dressed and while he was putting on his shoes he said that he was going to do some work around the house then he would be in. My mother-in-law got busy and didn't think much about him not being there, but when noon rolled around she was hungry and then wondered about Dad. They live about 12 miles out in the country, way off the beaten path. You can't see their house from the road. Mom wasn't too concerned at this point but as she got closer to the house she could see that Dad was laying on the ground. He was perfectly straight with one arm by his side and the other one was across his chest clutching his phone. He was already cold by the time Mom got there. In February they were in a car accident and Mom broke both her arms and Dad broke his knee cap. We thought that that was all the damage done to him. But apparently that wasn't the case. He died of a ruptured bowel and I believe that it all started with the car accident. Carl's family is very close and it hit everyone really hard. Carl and I are divorced but I still feel like part of his family. Carl and I are now just roommates. We were in Colorado a little over a week for the funeral, which had to be done on 2 different days. He was buried in the military cemetery and we could only get in there at 11:00am, noon, and 1:00pm. Since the service was held at 2:00pm we had to wait til the next day to do the graveside service. He had a full military funeral with the 21 gun salute and taps played. Was a very beautiful and moving service.
Also I fell again here at the house and I broke the bursa sac behind both knee caps. It is very painful to walk at times, and standing up is even a chore. I go back to the doctor on October 3, so wish me luck. I hope that I won't have to have surgery to repair them. Hopefully they will heal on their own.
So I will get some tuts up as soon as I can. Again, please accept my apology. Thanks.
Also I fell again here at the house and I broke the bursa sac behind both knee caps. It is very painful to walk at times, and standing up is even a chore. I go back to the doctor on October 3, so wish me luck. I hope that I won't have to have surgery to repair them. Hopefully they will heal on their own.
So I will get some tuts up as soon as I can. Again, please accept my apology. Thanks.
Tuesday, June 18, 2013
I want to thank Daagor for the awesome job she did on my blog. I love it. Maybe one of these days I will get the nerve to learn how to do them.
Sunday, June 9, 2013
Ok, so I started with a PTU scrap kit. This was for a challenge and when I saw the template I knew I had to use the Barbara Tube, so I got the kit to go with it. I hope that you like the first tut after my return. Here's to many more.
I make you go YeeHaw
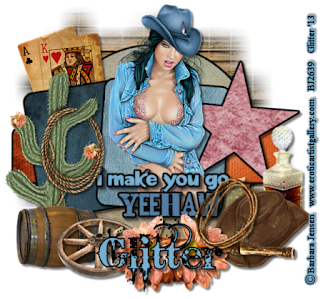
This is entirely my own design. Any similarities are purely coincidental.
Supplies Used
Paint Shop Pro I used PSP9
Tube of choice. I used a tube from Barbara Jensen in her layered 20 pack
HERE
Scrap kit. I used Wild Cowgirls, a Barbara Jensen Exclusive by Crazy Carita
HERE
Template by Millie’s PSP Madness Template 270
HERE
Mask of choice. I used WSL_mask84
HERE
Font of choice. I used Bleeding Cowboys
HERE
Let’s get started.
Open up the template in PSP. Shift + D to duplicate template. Close out original.
Image, Canvas Size, 766 x 766. We will resize down later.
Starting at the bottom of the template, click on the background. Copy and paste pp2.
Apply mask, merge group. Add drop shadow of 1, 1, 50, 5.
Select all, float, defloat, copy and paste as follows.
Layer 1 -- pp1
Layer 2 -- pp 6 orange area
Layer 3 -- pp4
Layer 4 -- pp7
Layer 5 -- pp10
Go back to all layers, expand by 4, add black backgrounds,
add drop shadows of 5, 5, 50, 5.
Elements Used.
El7 original size
El8 Resize 75% Duplicate mirror
El12 Resize 75%
El25 Resize 75% twice Rotate L 45 degrees
El27 Resize 80%
El28 Resize 50%
Go back to all the elements and Sharpen more.
Then go back and add drop shadow 5, 5, 50, 5.
On the top line of words copy and paste a light color from the tube.
On the bottom line of words copy and paste a dark color from tube.
Merge the two new word lines together, expand by 4, add black background.
Drop shadow 5, 5, 50, 5.
I save it here as a psp image. Then I merge visible, Copy and paste
A new image. Resize 97% all layers NOT checked. Resize down
To around 600 x 600 ALL layers checked.
Add your copyright information, add a color background and drop shadow
Of 2, 2, 50, 5.
Save here in png form or jpeg form. Add your name or names, or snag saying.
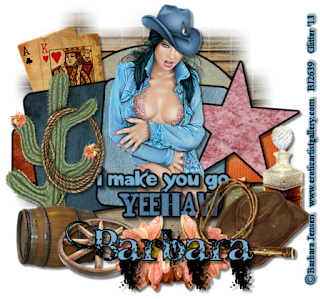
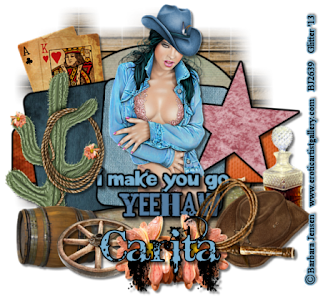

This is entirely my own design. Any similarities are purely coincidental.
Supplies Used
Paint Shop Pro I used PSP9
Tube of choice. I used a tube from Barbara Jensen in her layered 20 pack
HERE
Scrap kit. I used Wild Cowgirls, a Barbara Jensen Exclusive by Crazy Carita
HERE
Template by Millie’s PSP Madness Template 270
HERE
Mask of choice. I used WSL_mask84
HERE
Font of choice. I used Bleeding Cowboys
HERE
Let’s get started.
Open up the template in PSP. Shift + D to duplicate template. Close out original.
Image, Canvas Size, 766 x 766. We will resize down later.
Starting at the bottom of the template, click on the background. Copy and paste pp2.
Apply mask, merge group. Add drop shadow of 1, 1, 50, 5.
Select all, float, defloat, copy and paste as follows.
Layer 1 -- pp1
Layer 2 -- pp 6 orange area
Layer 3 -- pp4
Layer 4 -- pp7
Layer 5 -- pp10
Go back to all layers, expand by 4, add black backgrounds,
add drop shadows of 5, 5, 50, 5.
Elements Used.
El7 original size
El8 Resize 75% Duplicate mirror
El12 Resize 75%
El25 Resize 75% twice Rotate L 45 degrees
El27 Resize 80%
El28 Resize 50%
Go back to all the elements and Sharpen more.
Then go back and add drop shadow 5, 5, 50, 5.
On the top line of words copy and paste a light color from the tube.
On the bottom line of words copy and paste a dark color from tube.
Merge the two new word lines together, expand by 4, add black background.
Drop shadow 5, 5, 50, 5.
I save it here as a psp image. Then I merge visible, Copy and paste
A new image. Resize 97% all layers NOT checked. Resize down
To around 600 x 600 ALL layers checked.
Add your copyright information, add a color background and drop shadow
Of 2, 2, 50, 5.
Save here in png form or jpeg form. Add your name or names, or snag saying.


Thursday, June 6, 2013
I haven't posted in here in over a year. Kinda forgot about my little blog.
I have tons of free scrap kits and lots of tubes that I haven't used. So my goal is to write some tuts using them. I would love to be on some Creative Teams again, but I am going to start with the freebies first. Also I am going to try to change the background on my blog. I friend of mine did it the last time but she is no longer available. I really don't know how to do so I guess I am going to learn as I go. I sincerely apologize for not being here.
There has been lots of things going on with me medically. I have had 3 surgeries since I last posted. 1 on my left arm, moving my ulnar nerve so it isn't pinched all the time. It had been pinched for about 5 years and I lost feeling in my fingers. The feeling is starting to come back, but not as fast as I would like. The other 2 surgeries were on my right arm. I had the old hardware taken out and they put in new hardware in a different spot. I had 50 staples in so you can imagine how long the scar is, it isn't pretty. The pain is still there so this surgery was not a success. The other surgery was on my right shoulder. I had lots of pain and I couldn't raise my arm very far over my head. My shoulder was partially frozen. So there was a lot of tissue that was damaged and was removed. Also there are 2 tendons that go from the bicep to the shoulder, 1 long and 1 short. The doctor cut the long tendon to help the movement better. He said that if I was younger and into sports they would have fixed the tendon but since I am not in my 20's anymore they left it cut. If I thought I was in pain then it was nothing compared to the pain I have now. It hurts more now than ever before. I go back to the doctor the end of June for a checkup on my arm. I don't know what will be done now. I have been going to physical therapy but it really isn't helping that much, as far as I can see. The PT says that I have a good range of motion but the pain is so bad.
I also got a divorce last October after 19 years of marriage. I feel like a weight has been lifted off of my shoulders. I think we only had 2 good years and for the last 17 I was very unhappy.
Now I can get on with my life and hopefully find someone who will make me happy. I think I may have found him, but time will tell. We have been together for a year and a half now but we are going through a rough patch right now. He is fighting his feelings, he does this every so often. He was single for 19 years and he isn't ready to give that up just yet. I can understand that but it also frustrates me. He is 67 years old but still works driving a cement truck. He does not look or act his age. Very sexy.
Last September another grandson was born to my youngest son. His name is Chizm David, and yes that is spelled correctly. He was named after a world class bull rider. So there has been a lot of change in this past year, some good, some bad. But that is life, isn't it? Everyone goes through lifes ups and downs. I hope that you will like my tuts and visit often.
I will do my best to post at least 1 new tut a week, hopefully more, but I'm going to start slow.
I have tons of free scrap kits and lots of tubes that I haven't used. So my goal is to write some tuts using them. I would love to be on some Creative Teams again, but I am going to start with the freebies first. Also I am going to try to change the background on my blog. I friend of mine did it the last time but she is no longer available. I really don't know how to do so I guess I am going to learn as I go. I sincerely apologize for not being here.
There has been lots of things going on with me medically. I have had 3 surgeries since I last posted. 1 on my left arm, moving my ulnar nerve so it isn't pinched all the time. It had been pinched for about 5 years and I lost feeling in my fingers. The feeling is starting to come back, but not as fast as I would like. The other 2 surgeries were on my right arm. I had the old hardware taken out and they put in new hardware in a different spot. I had 50 staples in so you can imagine how long the scar is, it isn't pretty. The pain is still there so this surgery was not a success. The other surgery was on my right shoulder. I had lots of pain and I couldn't raise my arm very far over my head. My shoulder was partially frozen. So there was a lot of tissue that was damaged and was removed. Also there are 2 tendons that go from the bicep to the shoulder, 1 long and 1 short. The doctor cut the long tendon to help the movement better. He said that if I was younger and into sports they would have fixed the tendon but since I am not in my 20's anymore they left it cut. If I thought I was in pain then it was nothing compared to the pain I have now. It hurts more now than ever before. I go back to the doctor the end of June for a checkup on my arm. I don't know what will be done now. I have been going to physical therapy but it really isn't helping that much, as far as I can see. The PT says that I have a good range of motion but the pain is so bad.
I also got a divorce last October after 19 years of marriage. I feel like a weight has been lifted off of my shoulders. I think we only had 2 good years and for the last 17 I was very unhappy.
Now I can get on with my life and hopefully find someone who will make me happy. I think I may have found him, but time will tell. We have been together for a year and a half now but we are going through a rough patch right now. He is fighting his feelings, he does this every so often. He was single for 19 years and he isn't ready to give that up just yet. I can understand that but it also frustrates me. He is 67 years old but still works driving a cement truck. He does not look or act his age. Very sexy.
Last September another grandson was born to my youngest son. His name is Chizm David, and yes that is spelled correctly. He was named after a world class bull rider. So there has been a lot of change in this past year, some good, some bad. But that is life, isn't it? Everyone goes through lifes ups and downs. I hope that you will like my tuts and visit often.
I will do my best to post at least 1 new tut a week, hopefully more, but I'm going to start slow.
Monday, February 20, 2012

Here is a free to use template for you to use, no credit needed.
 PSP Format HERE
 PSP Format HERE
Saturday, February 11, 2012

Scrap Kit: Paint Your Dreams by Creative Scraps by Crys HERE
Tube: PinUp Toons Painter I got this at CILM but you can get it at CDO HERE
Mask: WSL_Mask38 HERE
Font: Shelley Volante HERE
Let’s get started.
I like to work on large canvases and resize at the end. All the resizing %’s are based on the large canvas. If you work with smaller canvases you will need to readjust your % numbers.
Kit Pieces Used:
Paper 8 Island Resize 80%
House Resize 70% Duplicate Resize 25% then 80%
Breeze2 Resize 70% Duplicate
Scatter Resize 50%
Butterflies Resize 70%
Butterfly scatter Resize 65%
Dreamingirl Resize 40% mirror
Butterfly Resize 25% Duplicate, mirror
Word art5 Resize 40%
Open a canvas of 900 X 775. C&P paper 8 as a new layer. Apply mask. Merge group.


C&P Island and place towards bottom.
C&P House, place where desired.
C&P tube. Resize 70%
Duplicate House resize and place on easel.
C&P other elements and place where desired.
I mirrored the girl and placed her chasing the butterflies.
On scatter use MuraMeister’s Copies

On word art apply glow

Add drop shadow to all layers. I used 5, 5, 50, 5 on all except the mask layer, which I used 2, 2, 50, 5.
Add your copyright and watermark.
Add names or snag words, and we are done.

I hope you enjoyed my tut. If you work it up I would love to see your results.
Please send them to: glitterdeb75@yahoo.com Thanks.
Monday, February 6, 2012

Supplies Used
Scrap kit used is Hug Bug from Creative Scraps
Mask used is Vix_Mask_Valentine15 Scroll almost to the bottom of the page HERE
Font used is MsMadi
Tube is Elias Chatzoudis Sweetheart at PTE
Open new canvas, I like to work on big spaces and resize later. So make it 850 X 750. All the resizing %’s are based on the large canvas, if you use a smaller canvas the resizing %’s will need to be adjusted.
Elements used from kit
HB_Element_1 Resize 50% then 75%
HB_Element_2 Resize 50% then 75%
HB_Element_3 Resize 50% then 75% and 75% again
HB_Element_5 Resize 65%
HB_Element_14 Mirror, Resize 50% then 75%
HB_Element_19 Is not resized, but expand by 2 and apply black layer behind, merge these 2 together.
HB_Element_20 Is not resized, but expand by 2 and apply black layer behind, merge these 2 together.
HB_Element_23 Resize 70% and outline with black like with elements 19 & 20.
HB_Element_34 Resize 50% then 75%
HB_Element_35 Resize 50% then 75%
HB_Element_47 Resize 50%
HB_Element_56 Resize 50%
HB_Frame_5 Resize 75% HB_Paper_1 HB_Paper_9
Not in kit but used for inside frame, new canvas 600 x 600 with the following color: 0189d2
C&P paper 1, apply mask, merge group.
C&P paper 9, apply mask, merge group.


Move one of the mask layers to upper left, move the other to lower right. Apply a slight drop shadow of 1, 1, 50, 5, or one of your choosing.
C&P Frame 5. Click inside frame with your magic wand, expand by 12.
C&P your color layer here (0189d2). Selections, invert, delete key, selections, select none.
Apply fritillary with the following settings: Granularity: 5 Aggression: 30 Tesselation: 20 Variation: 100

Apply drop shadow of 5, 5, 50, 5, or one to your choosing, on the frame.
On the fritillary layer, selections, select all, float, defloat.
C&P your tube, place under frame but on top of fritillary layer. Place where desired. Duplicate tube layer, move above frame and close out, by clicking on the eye in your layers palette. Go back to original tube layer, selections, invert, delete key, select none. Open duplicate tube layer, add drop shadow, and using your eraser tool remove the parts of the tube you want to eliminate.
Apply all the elements and place where desired.
Apply a drop shadow of 5, 5, 50, 5 on all your elements.
This is only a guide and you do not have to follow it exactly. Be creative.
Apply your copyright information and your watermark, and we are done.

I hope that you enjoyed my tut, if you use it I would love to see your results. Please email them to: glitterdeb75@yahoo.com Thanks so much.
Tuesday, January 17, 2012
 Supplies:
Scrap Kit: Birthday Bash by Angels Designz which you can find HERE or HERE
Mask: WSL_Mask38 HERE
Tube: I am using a freebie by TooshToosh which you can find HERE Even though this tube is free you will still need to use a license number on it.
Font: ShelleyVolante BT HERE
Let’s get started. Again I will have lots of screen shots for the beginner.
I like to work on a big canvas then size down at the end.
AD_Frame4: Duplicate this by holding down shift + D. Close out original, this way you won’t end up saving the frame and losing it from the kit. Go to Image, canvas size and make it 800 X 750. Resize frame 80% all layers NOT checked.
Supplies:
Scrap Kit: Birthday Bash by Angels Designz which you can find HERE or HERE
Mask: WSL_Mask38 HERE
Tube: I am using a freebie by TooshToosh which you can find HERE Even though this tube is free you will still need to use a license number on it.
Font: ShelleyVolante BT HERE
Let’s get started. Again I will have lots of screen shots for the beginner.
I like to work on a big canvas then size down at the end.
AD_Frame4: Duplicate this by holding down shift + D. Close out original, this way you won’t end up saving the frame and losing it from the kit. Go to Image, canvas size and make it 800 X 750. Resize frame 80% all layers NOT checked.

 AD_Paper8: Copy and paste this into your canvas, and place on the bottom. Apply mask, by Layers, New Mask Layer, From Image. Merge group.
 Go to the preset shapes and choose the elliptical. Make a circle with any color, it doesn’t matter we will delete this soon. Make it so the circle goes through the green circles on the frame layer, see sample. When you have the circle where you want it convert to raster layer. Select, select all, select, float, select, defloat on the circle. Copy and paste AD_Paper9, select, invert, delete key on keyboard, select none. Place your pink circle under the frame. You can delete your drawn circle now.

 Copy and paste the elephant and place where you want.
Copy and paste all the little critters from the tube and place them where you like them.
AD_ColorfulSplatter copy and paste this onto your canvas, resize by 50%. Here I used MuraMeister’s Copies. See example. Place below pink paper. Duplicate this layer 3 times, so you have a total of 4 layers of the confetti. This will brighten them up a bit.
Copy and paste the elephant and place where you want.
Copy and paste all the little critters from the tube and place them where you like them.
AD_ColorfulSplatter copy and paste this onto your canvas, resize by 50%. Here I used MuraMeister’s Copies. See example. Place below pink paper. Duplicate this layer 3 times, so you have a total of 4 layers of the confetti. This will brighten them up a bit.

 Copy and paste the following elements, resizing and placing as you like. I will show my resize percents.
AD_Cake 35%
AD_Drink2 25%
AD_PartyFavor 35% I rotated this 17 to the right.
AD_Wordart1 50%
Add a drop shadow where desired. I save my projects here in case I want to change something later. Merge visible, copy and paste into a new image. Resize down to proper size. Add your copyright info and your watermark.
Copy and paste the following elements, resizing and placing as you like. I will show my resize percents.
AD_Cake 35%
AD_Drink2 25%
AD_PartyFavor 35% I rotated this 17 to the right.
AD_Wordart1 50%
Add a drop shadow where desired. I save my projects here in case I want to change something later. Merge visible, copy and paste into a new image. Resize down to proper size. Add your copyright info and your watermark.
 We are done. I hope that you enjoyed this tut. If you work it up I would love to see what you did and put it up here on my blog.
Sunday, January 8, 2012
Hello everyone. I trust everyone had a Merry Christmas and a Happy New Year.
I made a template for an awesome group that i am in and I whipped up a tag to go with it. I used an awesome scrap kit from Gina at KiKeKa Kits called "I do". Check it out here.

 PSP format HERE
PSD format HERE
If you use my template I would love to see your results and will post them on my blog. Thanks so much.
PSP format HERE
PSD format HERE
If you use my template I would love to see your results and will post them on my blog. Thanks so much.

 PSP format HERE
PSD format HERE
If you use my template I would love to see your results and will post them on my blog. Thanks so much.
PSP format HERE
PSD format HERE
If you use my template I would love to see your results and will post them on my blog. Thanks so much.
Thursday, December 8, 2011
 I like to work on a large canvas and then size down at the end. It is easier for me because of my eyesight. Also this tut is entirely of my own imagination, any resemblance is purely coincidental.
Supplies:
Scrap Kit: The scrap kit I am using is called Snow Fighting Allowed by Gina at KiKeKa Kits and can be purchased HERE
Mask: The mask I am using is Vix_ChristmasMask1 which you can find HERE
Tube: I am using the awesome artwork of Ismael Rac which you can find HERE
Font: I am using Santa's Sleigh Full which you can find HERE
Start with a canvas size of 900 X 775. This gives me plenty of room to place the elements where I like them. We will resize later. You don’t have to start big if you don’t want to, but remember that the resizing listed is based on the large canvas. This tut is to be used as a guideline only, you don’t have to follow it exactly.
Start with cbg_snowfightingallowed_paper3. Copy & Paste (C&P) paper onto your canvas. Resize 75% 4 times. Layers, new mask layer, from image, apply mask, layers, merge, merge visible. Colorize paper using the following chart. Resize 110%.
I like to work on a large canvas and then size down at the end. It is easier for me because of my eyesight. Also this tut is entirely of my own imagination, any resemblance is purely coincidental.
Supplies:
Scrap Kit: The scrap kit I am using is called Snow Fighting Allowed by Gina at KiKeKa Kits and can be purchased HERE
Mask: The mask I am using is Vix_ChristmasMask1 which you can find HERE
Tube: I am using the awesome artwork of Ismael Rac which you can find HERE
Font: I am using Santa's Sleigh Full which you can find HERE
Start with a canvas size of 900 X 775. This gives me plenty of room to place the elements where I like them. We will resize later. You don’t have to start big if you don’t want to, but remember that the resizing listed is based on the large canvas. This tut is to be used as a guideline only, you don’t have to follow it exactly.
Start with cbg_snowfightingallowed_paper3. Copy & Paste (C&P) paper onto your canvas. Resize 75% 4 times. Layers, new mask layer, from image, apply mask, layers, merge, merge visible. Colorize paper using the following chart. Resize 110%.


 cbg_snowfightingallowed_frame04 Resize 35% ALL layers checked. C&P, resize 75%. With the magic wand click inside frame, selections, modify, expand, expand by 12. C&P cbg_snowfightingallowed_paper06 resize 50% 3 times, move paper to your liking. Selections, invert, delete key, selections, selection none. Place below frame.


 The following elements are a guideline for your tag, you may resize and place your elements to your liking. Remember to place a drop shadow of 5, 5, 50, 5, or one of your choice. Also remember that these resizes are for the large canvas, if using a smaller canvas your resizes will be different than mine.

 cbg_snowfightingallowed_snowman05 Resize 47% ALL layers checked. C&P resize 50% 2 times all layers NOT checked.
cbg_snowfightingallowed_deer01 Resize 58% ALL layers checked. C&P Resize 50% then 75% all layers NOT checked.
cbg_snowfightingallowed_deer02 Resize 66% ALL layers checked. C&P Resize 50% then 65% all layers NOT checked.
cbg_snowfightingallowed_bear Resize 60% ALL layers checked. C&P Mirror, resize 50% 2 times all layers NOT checked.
cbg_snowfightingallowed_carrot Resize 50% 4 times all layers NOT checked. Duplicate, mirror.
cbg_snowfightingallowed_dangle Resize 38% ALL layers checked. Resize 50% 2 times, duplicate.
cbg_snowfightingallowed_tree02 Resize 34% ALL layers checked. Resize 50% 1 time.
Here I save in psp form in case I want to change anything later. Then merge visible. Copy and paste as new image. Resize down to less than 600 X 600. Add your copyright info and watermark. We are finished.
cbg_snowfightingallowed_snowman05 Resize 47% ALL layers checked. C&P resize 50% 2 times all layers NOT checked.
cbg_snowfightingallowed_deer01 Resize 58% ALL layers checked. C&P Resize 50% then 75% all layers NOT checked.
cbg_snowfightingallowed_deer02 Resize 66% ALL layers checked. C&P Resize 50% then 65% all layers NOT checked.
cbg_snowfightingallowed_bear Resize 60% ALL layers checked. C&P Mirror, resize 50% 2 times all layers NOT checked.
cbg_snowfightingallowed_carrot Resize 50% 4 times all layers NOT checked. Duplicate, mirror.
cbg_snowfightingallowed_dangle Resize 38% ALL layers checked. Resize 50% 2 times, duplicate.
cbg_snowfightingallowed_tree02 Resize 34% ALL layers checked. Resize 50% 1 time.
Here I save in psp form in case I want to change anything later. Then merge visible. Copy and paste as new image. Resize down to less than 600 X 600. Add your copyright info and watermark. We are finished.
 I hope you enjoyed my tut, I would love to see your results. Send them to me at glitterdeb75@yahoo.com with Snow Fighting Allowed in subject line and I will put them on my blog.
Wednesday, December 7, 2011
 Supplies:
Mask: sg_Christmas6
Not sure where I got this mask so I am including it here, just right click and save. If this is your mask please let me know and I will credit you or remove it. Thanks.
Supplies:
Mask: sg_Christmas6
Not sure where I got this mask so I am including it here, just right click and save. If this is your mask please let me know and I will credit you or remove it. Thanks.
 Tube: My choice is from Eugene Rzhevskii at Pics for Designs. Please don’t use this tube unless you have a license and have acquired it legally. HERE
Scrap Kit: Scrap kit from Naughty Angelz Creation’z and can be purchased HERE
Font: Shelley Volante HERE
I like to work on a large canvas and then size down at the end. It is easier for me because of my eyesight. Also this tut is entirely of my own imagination, any resemblance is purely coincidental.
Start with a canvas size of 950 X 775. This gives me plenty of room to place the elements where I like them. We will resize later. You don’t have to start big if you don’t want to.
Flood fill with #d06183. Open your mask in psp, layers, new mask layer, from image. Merge group. Put a light drop shadow of 2, 2, 50, 5 on, or one of your choice.
Tube: My choice is from Eugene Rzhevskii at Pics for Designs. Please don’t use this tube unless you have a license and have acquired it legally. HERE
Scrap Kit: Scrap kit from Naughty Angelz Creation’z and can be purchased HERE
Font: Shelley Volante HERE
I like to work on a large canvas and then size down at the end. It is easier for me because of my eyesight. Also this tut is entirely of my own imagination, any resemblance is purely coincidental.
Start with a canvas size of 950 X 775. This gives me plenty of room to place the elements where I like them. We will resize later. You don’t have to start big if you don’t want to.
Flood fill with #d06183. Open your mask in psp, layers, new mask layer, from image. Merge group. Put a light drop shadow of 2, 2, 50, 5 on, or one of your choice.


 Copy & Paste (C&P) fr2. Resize 150%, adjust, sharpness, sharpen. Place in center of mask. Using the magic wand click inside frame, selections, modify, expand 12. C&P pp6, selections, invert, delete key, selections, select none. Place below frame layer.


 Put your tube in here. I used the awesome artwork of Eugene Rzhevskii, but you may use another one if you like. Remember, tuts are just guidelines, you don’t have to follow them exactly.
The following elements are a guideline for your tag, you may resize and place your elements to your liking. Remember to place a drop shadow of 5, 5, 50, 5, or one of your choice. Also remember that these resizes are for the large canvas, if using a smaller canvas your resizes will be different than mine.
Ele7 Resize 65% then 60%.
Ele11 Resize 50% 2 times, duplicate 3 times so you have 4 snowflakes.
Ele14 Resize 50%. I separated the words and placed them closer together.
Ele15 Resize 65% 3 times, duplicate 2 times so you have 3 light pink packages.
Ele18 Don’t resize, leave as is.
Ele19 Resize 50% then 75%.
Ele21 Resize 65% then 75%.
Ele22 Resize 85%.
Ele33 Resize 65% 2 times.
Ele37 Resize 65% 2 times.
Ele51 Resize 65% 2 times, duplicate 3 times so you have 4 dark pink packages.
Ele55 Resize 75%.
Ele57 Resize 65% then 75%.
Here I save in psp form in case I want to change anything later. Then merge visible. Copy and paste as new image. Resize down to less than 600 X 600. Add your copyright info and watermark. We are finished.
Put your tube in here. I used the awesome artwork of Eugene Rzhevskii, but you may use another one if you like. Remember, tuts are just guidelines, you don’t have to follow them exactly.
The following elements are a guideline for your tag, you may resize and place your elements to your liking. Remember to place a drop shadow of 5, 5, 50, 5, or one of your choice. Also remember that these resizes are for the large canvas, if using a smaller canvas your resizes will be different than mine.
Ele7 Resize 65% then 60%.
Ele11 Resize 50% 2 times, duplicate 3 times so you have 4 snowflakes.
Ele14 Resize 50%. I separated the words and placed them closer together.
Ele15 Resize 65% 3 times, duplicate 2 times so you have 3 light pink packages.
Ele18 Don’t resize, leave as is.
Ele19 Resize 50% then 75%.
Ele21 Resize 65% then 75%.
Ele22 Resize 85%.
Ele33 Resize 65% 2 times.
Ele37 Resize 65% 2 times.
Ele51 Resize 65% 2 times, duplicate 3 times so you have 4 dark pink packages.
Ele55 Resize 75%.
Ele57 Resize 65% then 75%.
Here I save in psp form in case I want to change anything later. Then merge visible. Copy and paste as new image. Resize down to less than 600 X 600. Add your copyright info and watermark. We are finished.
 I hope you enjoyed my tut, I would love to see your results. Send them to me at glitterdeb75@yahoo.com with Frosted Pink Christmas in subject line and I will put them on my blog.
Subscribe to:
Posts
(Atom)